Rebulding a gearbox is not hard, but you do need a press and some instructions. This is how I put gearboxes together.
For the housing, I like to sandblast, then bead blast and then clear coat the housing. This makes it look great and keeps it looking good for years to come. If any of the cover plate holes are stripped out, you can fix those with helicoils. Paint any exposed parts of the shafts. Get new parts as needed.
For all gearboxes, add a drain plug into the bottom side and use a flush pipe plug. For the 500 gearboxes, drill a 1/2″ hole in the top of the housing for a fill port and plug it with a new cap.
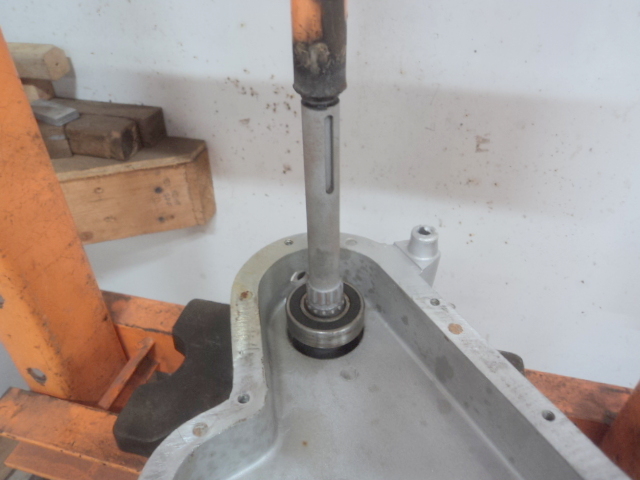
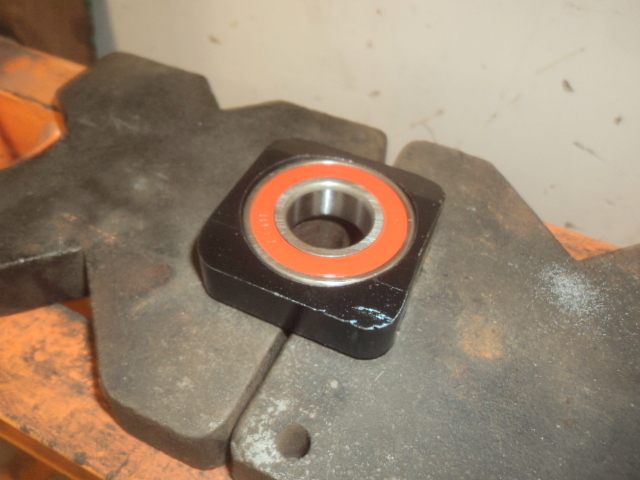
Start by pressing the internal bearing on to the upper shaft. Also install the outer bearing in the housing. Do not try and press this bearing into the housing. If it gets cocked at all, you can break the gearbox. Just use a hammer and tap on the outer race and work it into the housing.
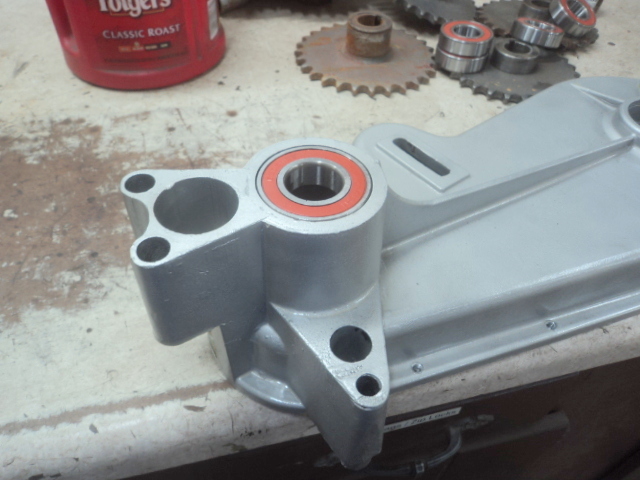
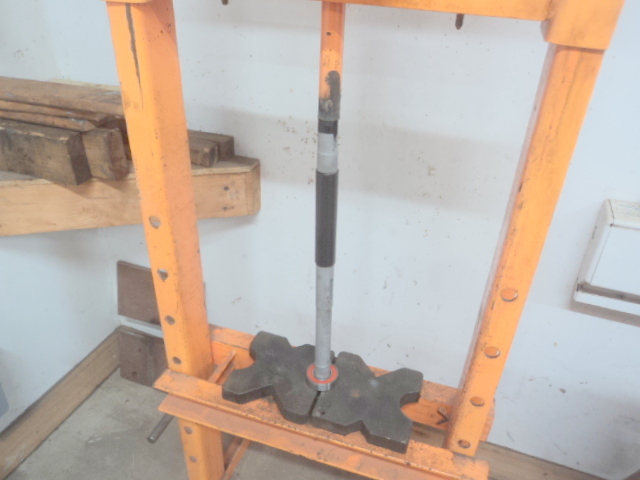
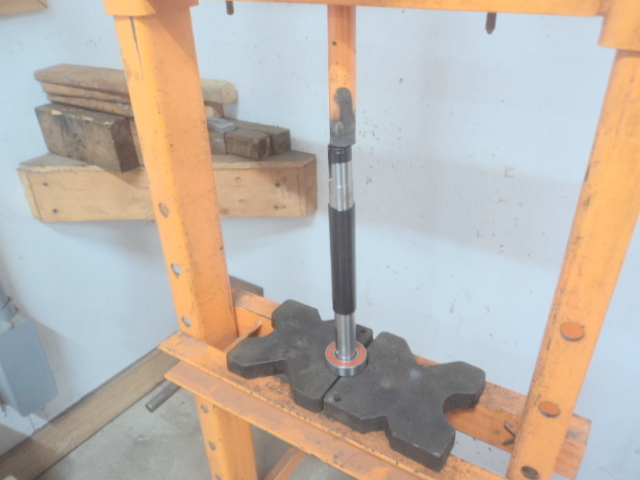
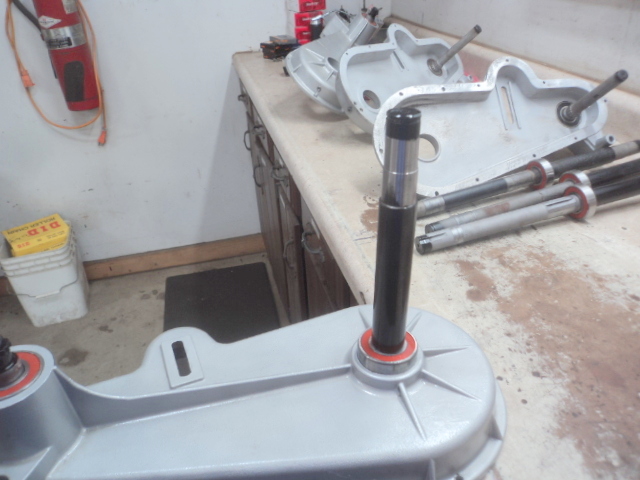
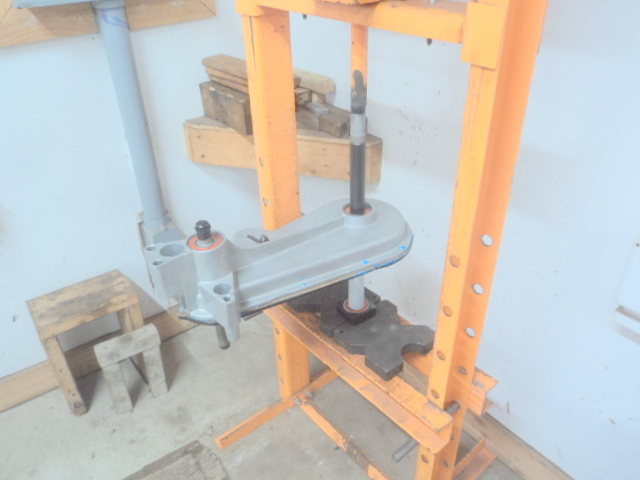
Put the housing into the press and press the shaft into the outer bearing as shown. The bearing that is on the shaft already will follow the shaft and seat itself into the housing.
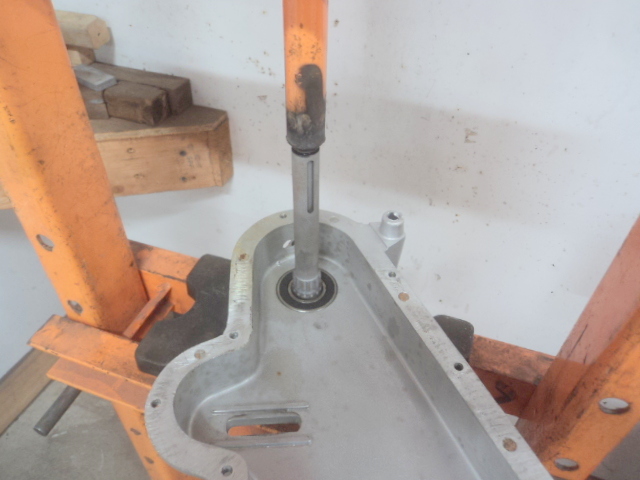
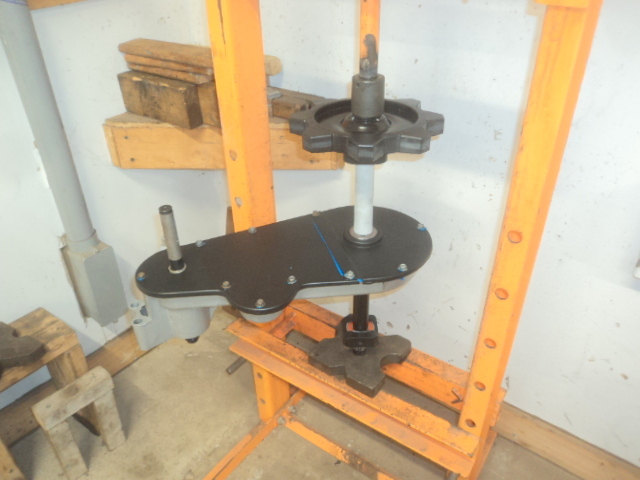
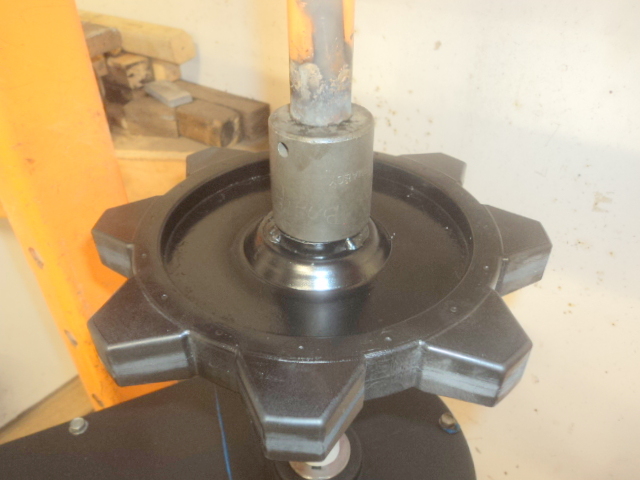
Press the lower shaft into the bearing. You will need to press the bearing past the outer bearing surface to get it to the inner bearing surface.
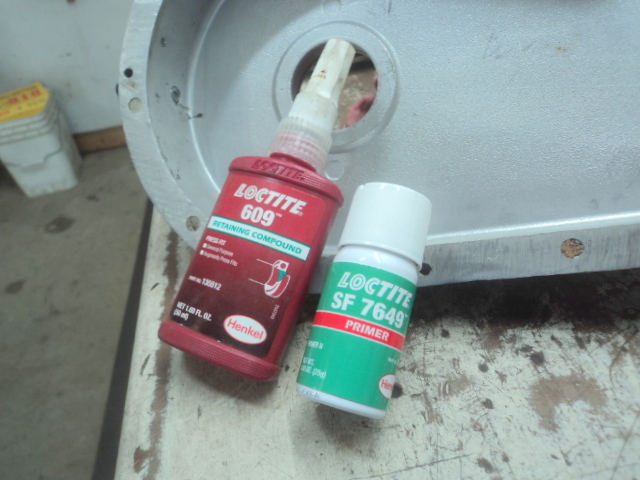
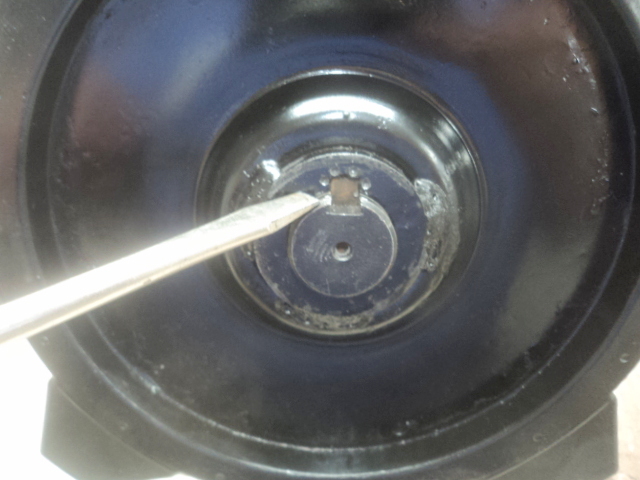
For the lower bearing fit in the housing, I like to use retaining compound as this bearing fit sometimes gets loose. It also helps seal around the bearing to help with less oil leakage. Spray on the primer. Put the retaining compound in the housing where the bearing is going. Set the housing as shown with the lower shaft set in place, then pick up the housing and bring it down sharply on the bench holding the upper shaft end and the weight of the lower shaft will push the bearing into place. Again, do not try and press this in to place or risk breaking the casting. Install the snap ring.
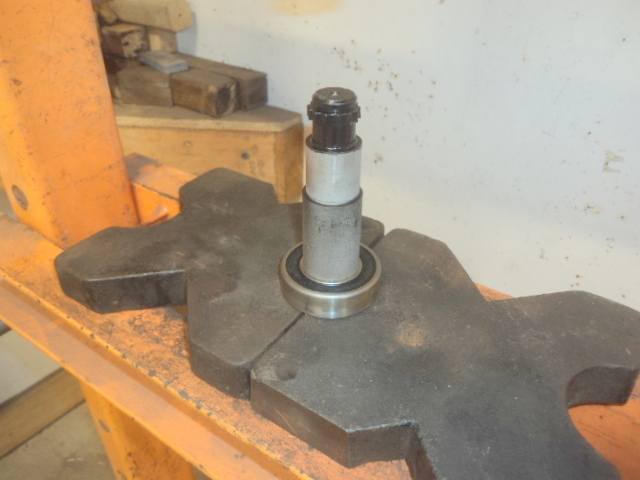
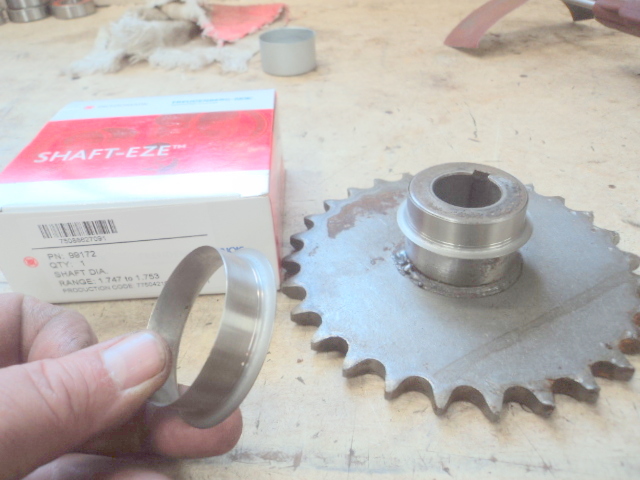
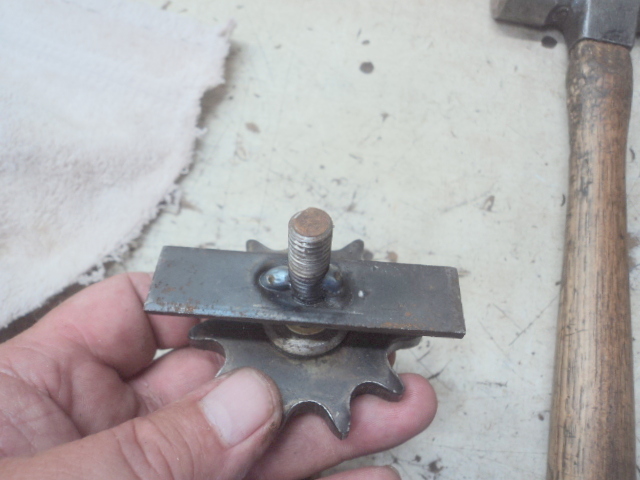
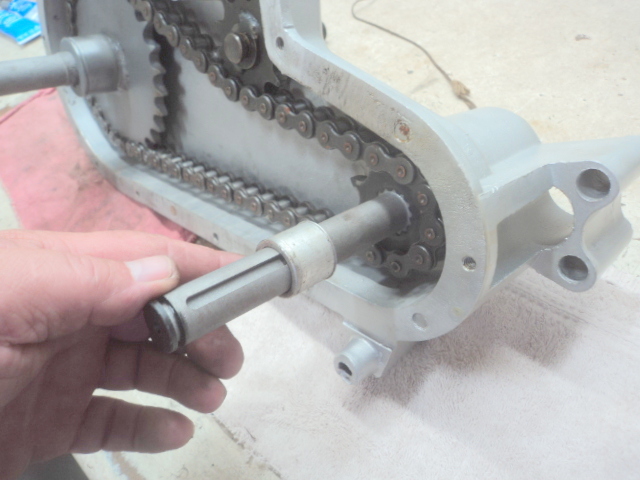
If the seal surface of the lower gear is worn, you can fix that using a Speedi-Sleeve. For the idler sprocket, make sure the two small tac welds are in place holding the shaft to the plate. If this breaks loose while in the gearbox, you might not be able to adjust the chain tension. If the bushing is loose, replace it.
Typically when putting together a gearbox for the model 500, you will find that the plate on the idler sprocket is not long enough to completely cover the open slot in the gearbox. To fix this, add some additional metal to the plate. If you find a 500 gearbox that still has the plastic idler (shown below), replace that with a steel idler.
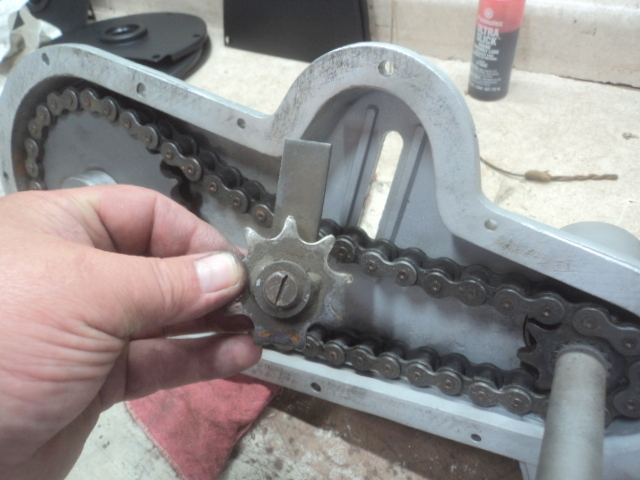
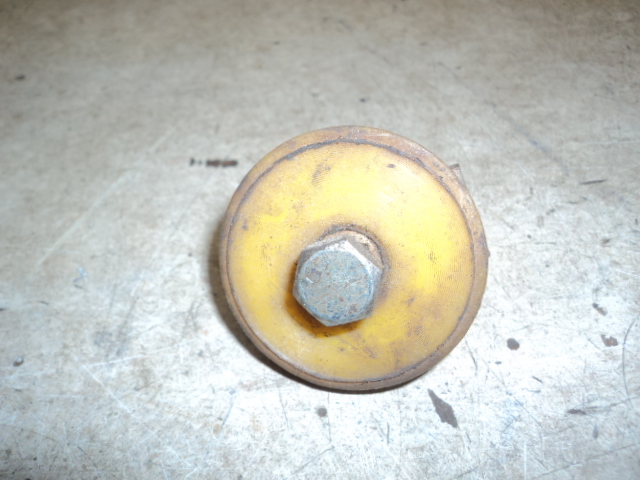
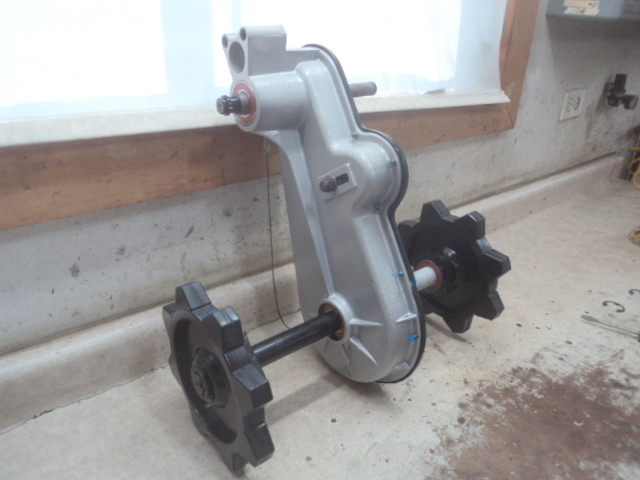
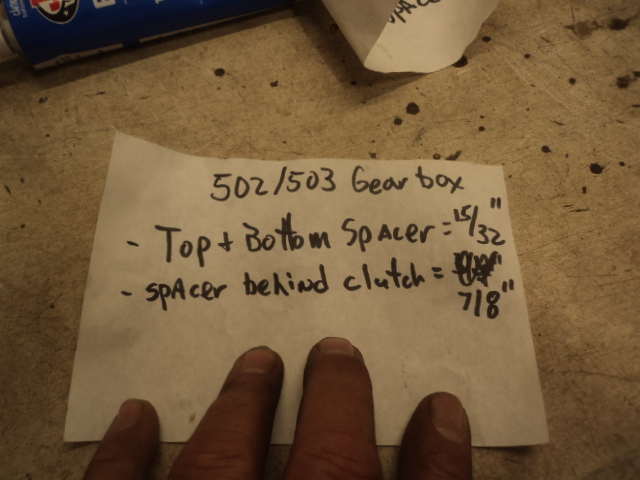
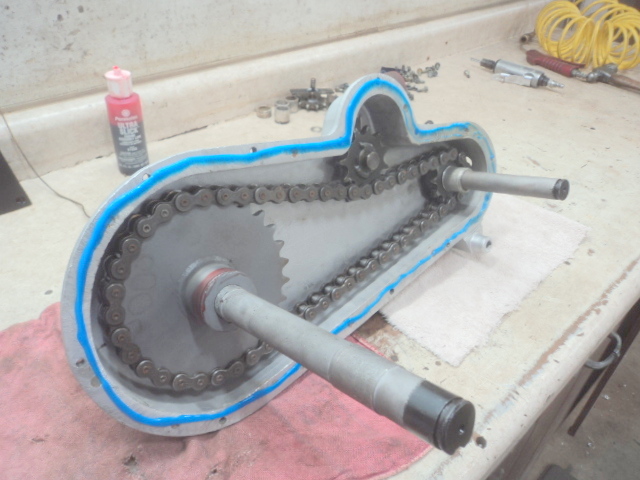
All gears have aluminum spacers behind them. The 500 gearbox has two different width spacers and the 502/503 gearboxes use the same width spacer. Also make sure you have the correct aluminum spacer that fits against the upper gear and is a spacer between the gear and the secondary clutch.

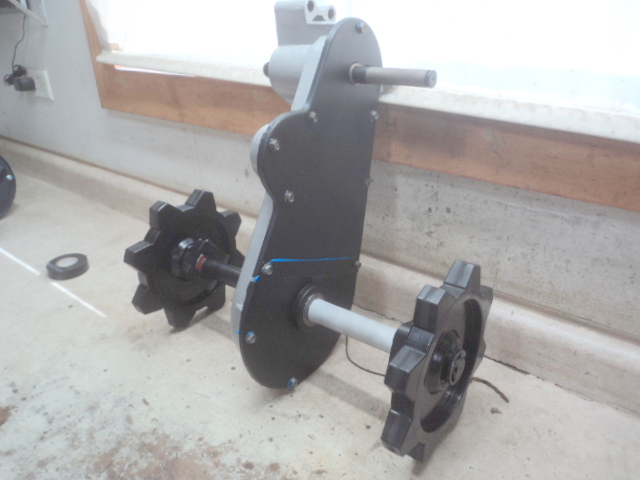
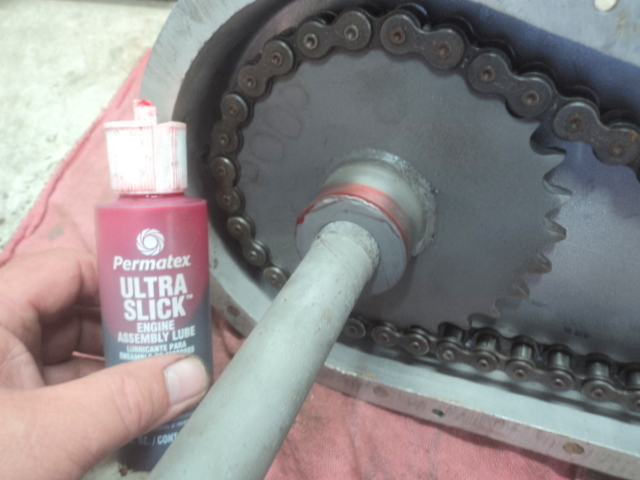
Make sure you can slide the lower gear into place without binding. Then install both gears and the chain at the same time and set them into place. Install the idler sprocket and set the tension on the chain. You should be able to turn the gearbox over without it binding but the chain should be fairly tight. Install the aluminum spacer as shown.
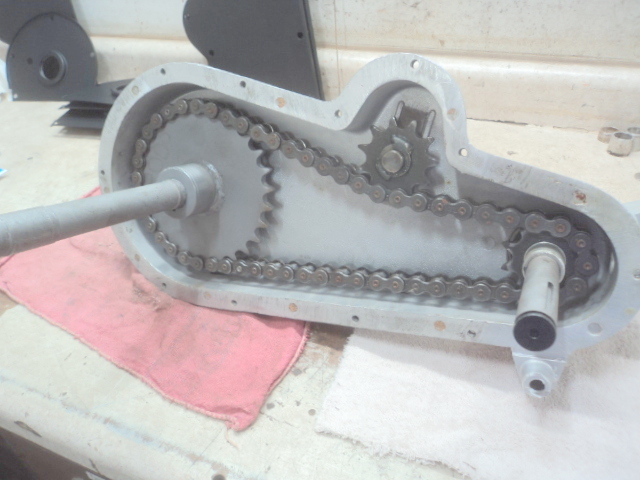
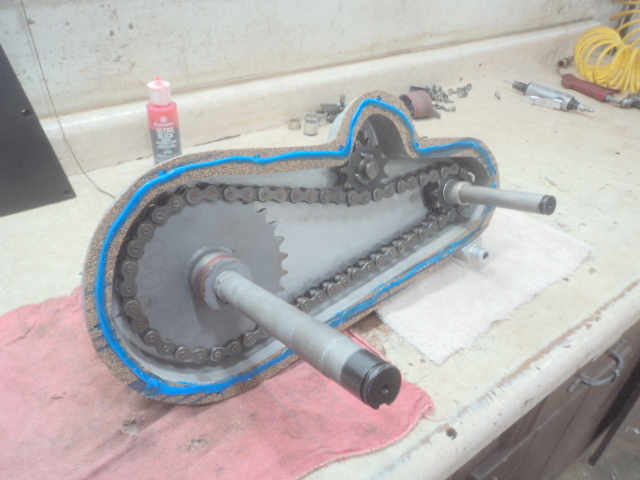
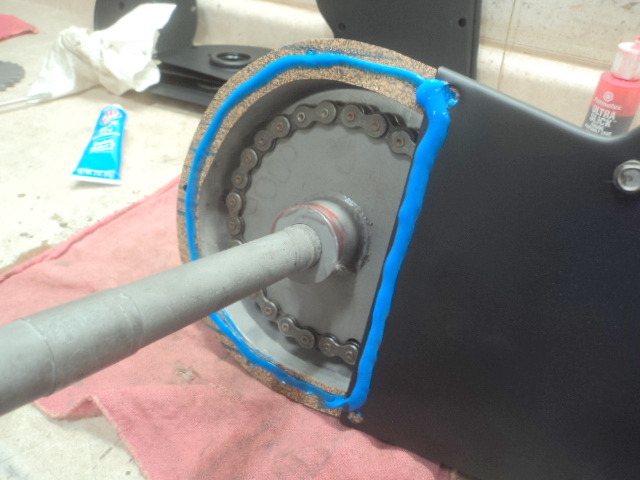
Lay a bead of silicone on the housing making it heavier on the bottom half circle area. Place the gasket. Lay another bead of silicone over the gasket again putting it on heavier on the bottom half circle area.
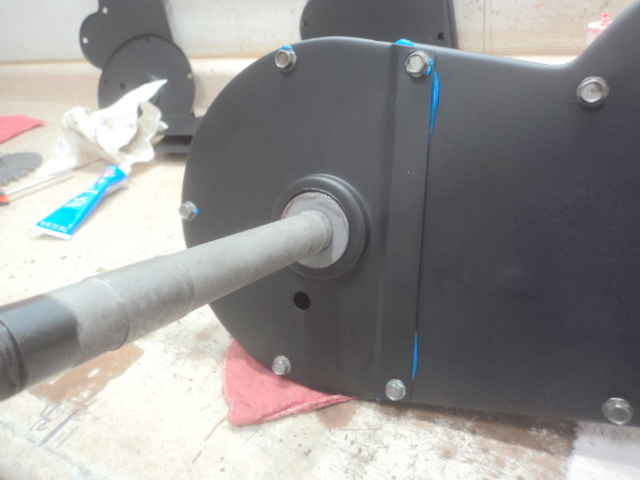
Place the top cover in place making sure the aluminum spacer on the top shaft lines up with the hole in the cover. The spacer should just stick through the cover slightly. Snug up the bolts. Put some lubricant on the bottom gear where the seal rides.
Lay a heavy bead of silicone over the bottom end of the upper cover. This is where the bottom cover overlaps the top cover. Work the seal into place and set the bottom cover. Again, snug up the cover bolts. Now set the gearbox aside and let the silicone cure before fully tightening the cover bolts.
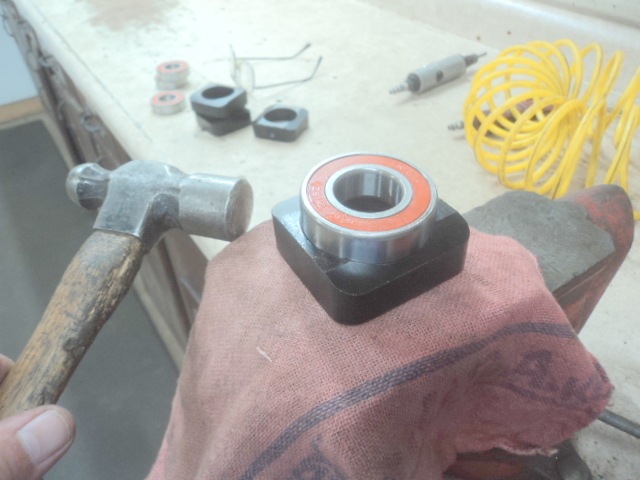
Install the bearings into the bearing blocks by tapping them in with a hammer. Do not try and press these into the blocks as often the hard brittle cast iron block will break.
Press the shaft down into the bearing and housing. Sometimes, the bearings when in the housing seem like they have a loose fit and that is normal. You can tape around the housing to hold it in place until you put it in the chassis.
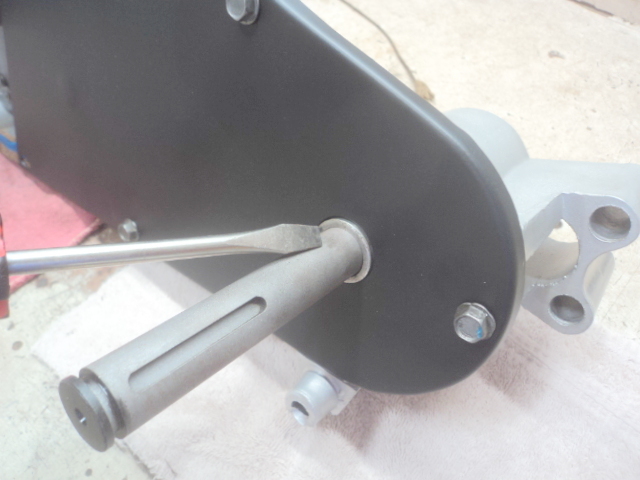
If drive sprockets have new hubs in them, they will press on fairly hard. A good tight fit is a good thing. If a hub is very tight to start with, I use a die grinder and grind some material out of the leading side of the bore so that it gets started on the shaft. I also use the die grinder and take just a bit off of the shaft end where the E clip mounts. Often this is mushroomed a bit over the years and you don’t want to break the shoulder off the shaft. Carefully press the drive sprocket on to the shaft going just far enough that the ring groove is showing.
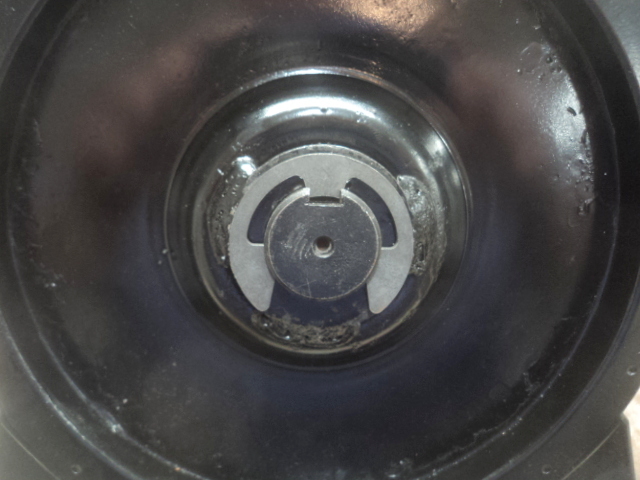
Once in place, I like to center punch some around the keyway to kind of cave in the end of the keyway and lock the key in place. Then when putting the E clip in place, put the center tab over the keyway. The 500 gearboxes have a narrower groove, but you can make the groove wider to accept the E Clip instead of using the small original snap ring.
With some luck, you have a brand new gearbox that will last your lifetime.